Backyard garden

Gardening with Chef Sandra: Starting A Garden – Selecting Your Plants

Many may feel like starting a garden in these challenging times may be difficult. We are here to tell you that it is not!  There are many resources that you can access to get your own garden started.  Whether in containers, above ground, in the ground, or planted in whatever you can find around the house, starting a garden does not have to be a tough task.
Let’s begin with ordering a few plants to start with.  You can certainly start with seeds. However, it is important to identify your zone so you can ensure that you are starting the right things at the right time of the season.  For myself, I just ordered some things curbside from Calloways Nursery.

Where to Order Plants

I receive a local Garden Center newsletter  “Calloway’s Nursery” and recently discovered they offer curbside service. I was ecstatic! Gardening is more than just a hobby to me. It is a way of life, one that I have grown up learning and knowing.  One of the locations I used to frequent in my area closed, so I was glad to see this being offered, especially now. What a great discovery!  I wanted to add a few more things to my garden and because of the timing to plant here, I wanted to find a few starter plants.  All of the plants I purchased are in 4 inch pots which are perfect for planting.  You can also order planting soil, fertilizers, pots, etc from them so getting everything you need for your garden is not a problem.  If you are not near a Calloways Nursery, check into your local nurseries and home improvement stores as they may offer the same convenient services.

Selecting Your Plants

First thing in the cart was a Basic Pepper Trio (includes 2 bell pepper plants and 1 hot pepper plant).  I also purchased their Herb de Provence Kit that includes a 5 pack of herbs that included lavender, marjoram, thyme, oregano and rosemary.  ALL of these items make an appearance in my cooking and they are so easy to grow! And as if I don’t already have enough tomatoes growing, I also purchased the Tomato Starter Trio which includes a large tomato plant, a plum variety, and a cherry tomato.  I could not resist.  There is nothing like a fresh home grown tomato.  We ate tons of them growing up in our family garden.
Once I get my plants, I will show you how to plant bell peppers in a container. In preparation for this, you need to get the right sized pot to plant your bell pepper plants. So what size pot should you get?

Preparing to Plant Bell Peppers

Bell peppers need a well-draining pot that is at least 10 to 12 inches deep and 10 to 12 inches across. The material of the pot is not as important as its size. You want something that is large enough to accommodate the maturing pepper plant.  It should also be deep enough to encourage proper root development.  You can find containers around the house or feel free to add it to your cart when purchasing your plants.
Check out my recent video about seeds and get a peek at my backyard garden!

Where to Find Seeds

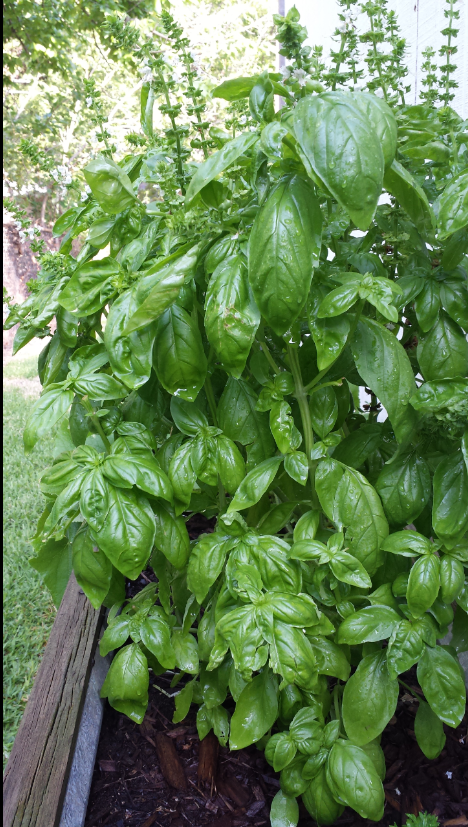
To find out where to get seeds, check out the links in a previous post about Thai Basil.

MAPLE AND ORANGE GLAZED HASSELBACK BUTTERNUT SQUASH

Maple and Orange Hasselback Butternut Squash
INGREDIENTS

  • 1 medium to large butternut squash
  • ¼ cup maple syrup
  • 2 tablespoons fresh squeezed orange juice
  • 1 tbsp extra virgin olive oil
  • 2 tbsp Dijon or  whole grain mustard
  • 1 tbsp finely chopped fresh thyme
  • 1 tbsp finely chopped marjoram
  • Sprinkle of salt and pepper


INSTRUCTIONS

  • Preheat your oven to 425°F

  • Adjust the oven rack to the top third position.
  • Cut the butternut squash in half lengthwise and scoop out the seeds and pulp and discard.

  • Remove the tough outer skin as well as the thin whitish layer beneath it.  Try using a vegetable peeler to complete this task. Once done, the orange flesh should be completely exposed.

  • On the roasting pan, place both squash halves cut side down.

  • Place in oven and bake for 20 minutes.

  • While the squash is in the oven, combine the maple syrup, orange juice, olive oil, Dijon mustard, chopped herbs, salt and pepper in a small bowl and mix well with a small whisk until completely combined.
  • Remove from the oven and let the squash cool until you can safely handle it with your bare hands.  This roughly takes about 5-10 minutes.

  • Move one squash half to a cutting board and place the handle of a wooden spoon (or other wooden utensil) on either side of the squash. The wooden tools will serve as guards to prevent the blade from going all the way as you slice through the squash.

  • Grab a sharp knife and carefully cut very thin slits in the squash, starting at the narrow end. DO NOT cut all the way through the squash. Return the sliced squash to the baking sheet and repeat with the second half.

  • Coat the squash halves with about 1/3 of the syrup mixture by brushing the mixture over the squash halves, paying special attention to getting the mixture down in between the slits.

  • Add 1/4 cup of water to the bottom of the pan and return to oven for 15 minutes.

  • While in the oven, constantly check on the squash to ensure that the syrup at the bottom of the pan doesn’t burn.  Remember, if needed, you can always add a small amounts of water, a few tablespoons at a time. Make sure not to add too much water.

  • After 15 minutes, remove the squash from the oven and brush with more of the syrup mixture.  Also, brush with some of the liquid at the bottom of the pan (pan juice) to boost this dish’s flavor and color.

  • Add another 1/4 cup water to bottom of the pan and return to the oven for another 15 minutes.

  • Remove the squash from the oven and brush with some of the pan juices.

  • If you would like to add the chopped pecans, now is the time.  Add them to the remaining syrup glaze and stir to combine. Spoon the pecan syrup glaze mixture over the top of the squash, dividing it equally between both halves.

  • Add another 1/4 cup water to bottom of the roasting pan and return it to the oven for the last 5 minutes, or until the squash is golden and tender.

  • Remove from oven; spoon some of the pan juices over the squash, sprinkle with a little bit of fresh herbs and a pinch of salt.

  • Move your masterpiece carefully over to a serving plate and ENJOY.

NOTES: 

This dish is sure to wow your family and friends so don’t be surprised when they are taking pictures and coming back for seconds !  This recipe was greatly inspired by The Healthy Foodie’s Honey Glazed Hasselback Butternut Squash.

Maple and Orange Hasselback Butternut Squash

Spring is Here…Time to Prepare Your Garden

The weather is warming up and there is still time to get your gardens prepared.  The average date of the last freeze in North Texas is the third week in March so now is the time to get started.   I’ve followed Neil Sperry for many years for his expert advice on gardening and so much more on his weekly radio show .  I ran across this great online guide titled “Everything you need to know to plant a successful vegetable garden here in North Texas”.

He includes are some very informative tips, check it out.

http://www.star-telegram.com/living/home-garden/neil-sperry/article194406789.html

Pick the sunniest site. Vegetables need sunlight.

Provide perfect drainage. No vegetable crop grows well in waterlogged soil.

Start small. Too many gardeners are overly ambitious at the outset, only to become discouraged by their poor results when they can’t maintain all the space they’ve opened up. Choose only crops your family really likes, then specialize in those. You can always expand the second time through, but if you fail you may never come back.

Prepare the soil carefully. Organic matter is your key to success. Add 5 or 6 inches of a blend of sphagnum peat moss, compost, well-rotted manure, finely ground bark mulch and other organic matter and rototill to a depth of 12 inches.

Know the proper planting time for each crop that you’re growing. This is a really big issue! Every crop has a two- or three-week window in which it must be planted. If planted too early it may not survive the cold weather. If planted too late it may not mature before heat sets in. This is one of the main places where people set themselves up to fail.

Here are some of the main crops and their timing. Late January: English peas, asparagus (perennial), onions. Mid-February: cabbage, broccoli, cauliflower, Brussels sprouts, Irish potatoes. Late February, early March: leaf lettuce, Swiss chard, radishes, carrots, turnips, beets. Late March, very early April: beans, corn, tomatoes, peppers, squash, melons, cucumbers. Mid-April into early May: sweet potatoes, okra, southern peas.

Choose the best varieties of each crop that you grow. Texas A&M vegetable specialists have lists online. In many cases they will be hybrids selected for productivity, yield, flavor and pest resistance. Many of the old heirloom varieties, tomatoes for example, are notoriously poor producers in Texas conditions. Limit the numbers of those that you try.

Care for your plants regularly. Check them daily once they start growing

Harvest your produce at the peak of maturity. In many cases, that will be before it reaches full size. Cucumbers, okra and summer squash, for example, should be harvested when they’re little more than half their full size. The same goes for carrots, green beans and lettuce leaves, and you harvest broccoli before any of the flower buds actually start to open.

Extend the season by planting fall crops in the same ground. Truth be told, fall vegetable gardens are often more productive than their spring counterparts.

Involve a youngster in your gardening plans. Whether it’s a child, grandchild, niece, nephew or students at a school in your neighborhood, there’s something magical about helping little hands plant big seeds and guiding them in growing vegetables all the way to harvest. It’s something neither you nor they will ever forget.


Fresh From the Gardens at the Garden Show in McKinney

The Garden Show in McKinney was a great event!

There were a variety of vendors who were eager and ready to greet you and envelope you in the world of gardening.  I had an awesome time visiting all of the vendors and learning about their products or services. Even bought myself a bunch of fresh, organic herbs…they smelled amazing! The speakers were so informative and passionate about their topics that it motivated you just hearing them speak. I felt honored to be able to share my passion of canning!

Though there was a lot of hustle and bustle leading up to the event and I even lost my voice a bit, I enjoyed every minute of it! From chatting it up with canning enthusiasts to hopefully gaining new canning friends in my seminar “Preserving Your Harvest”, my weekend in McKinney was well worth it.

Thank you to everyone who came out to the Garden Show in McKinney and stopped by my booth or joined me for one of my “Preserving Your Harvest” presentations!  It was great meeting so many people and visiting all of the vendors at the show.