Grow it in a Container!

I have been doing some sort of container gardening for years. I have memories as a child pulling weeds from our in-the-ground family garden. I was so glad when Dad decided to build all types of container gardens all over our yard. It was not unusual to see a flower growing in the same pot as something good to eat. One of the things I learned early is that food can be grown in just about any type of container, and it does not have to be fancy or expensive. It does however need good drainage. Another thing my dad taught me is that when you drill a hole for your container, you should drill your hole on the side of your pot near the bottom instead of in the bottom of your pot. That will ensure that no weeds or other plants will grow in the bottom of your pot.

Check out what my dad grows in along with the wooden containers he built. We’re talking laundry baskets, tubing, the bottoms of those big water bottle dispenser, and he kept an old bathtub that was removed from the house and turned it into a place to grow food.

Dad's Container Garden Collage

  • Make sure your container has proper drainage. The minimum size holes you drill should be about 1/2 inch in diameter for small to medium pots For larger sized containers, look for at least an inch in diameter.
  • It is a total myth that adding gravel, pot shards or stones to the bottom of your container garden, you will increase drainage. Some people even say you don’t need drainage holes if you put these things in the bottom of your pots. Putting gravel into the bottom of pots reduces the capacity of potting soil to drain. The problem is that water flows through similar textures and when it hits a different texture, gravel for example, the flow stops and the water backs up into the soil.
  • Container gardening requires frequent watering and during the summer months, your containers may need watering twice a day – that’s certainly the case in Texas!
  • Pay close attention to plans made of clay or other unglazed pottery. Porous containers tend to try out more quickly than other materials.
  • Almost any kind of plant is suitable for container gardening; the depth of the root length, however, will determine how large a container is required. Plants for container gardening that will extend to long root depths, such as trees will need deeper containers, whereas shorter root length plants will do fine with more shallow containers.
  • Adequate sunlight is essential to any successful garden, and container gardening is no different. Keep in mind you may need to move your plants from one location to another in order to follow the path of sunlight. It may be beneficial for you to place heavier containers on castors in order to facilitate moving more easily. Know how much sun your plants may need.
  • Mixing and matching plants for the purpose of container gardening is quite popular and can produce glorious results. When selecting plants to place together in your container, however, keep annuals and more permanent plants separated.

Learning how to garden in containers is not hard. It does require a little TLC but no weed pulling, digging or getting on your hands and knees in order to work your garden.

So why not give container gardening a try. Start small and let me know how it goes.

Happy Container Gardening!


Time to Plant Onions

I love the taste of fresh home grown onions and I grow them often. And I can’t tell you how many onions I’ve eaten from Dad’s garden. When they are that fresh, I enjoy eating them raw or adding them to a bowl of cucumbers from the garden along with tomatoes and making a quick little brine to eat at the dinner table. In Texas, onions can be planted as early as January and can withstand the cold temperatures.

They typically come in a bunch of about 60 small transplant plants an each one can be planted separately so you end up with a lot of onions. This year I bought both red and white bulbs. If you don’t have time to plant them immediately, do what my dad recommends. Put the entire bunch into the ground or a pot and keep them moist until you are ready to plant them individually. You’ll see me placing mine in my container until ready to plant at which time I’ll separate them.onion collage

Onions 101 – What you should know

  • The onion is a rugged plant and can withstand some weather at below- freezing temperatures.
  • Onions should be in the garden four to six weeks prior to the last frost date. Without some cool days, you will not get good top growth.
  • The warmer temperatures will generate a larger bulb. As a matter of fact, the trigger to activate a large bulb is warmer temperatures and longer days.
  • So the sooner you get them into the ground, the better they will grow.
  • Onions need full sun. They prefer a sandy loam but will grow reasonably well in clay soil.
  • Prepare the soil well before planting, removing all weeds and fertilizing with a high phosphorus (10-20-10) fertilizer (my dad’s favorite)
  • Onions need plenty of water during their early rapid growth.
  • You should plan the site near a water supply if possible so you can control the moisture if the rains do not come at the needed time.
  • Once the bulbs form, they can stand a much drier climate.
  • Make it easy on yourself and buy transplants, called slips, or sets from your seed store. I got mine from Calloway Nursery, but have also found them at Home Depot and Walmart.
  • If you choose sets, try to buy sets that are about one-half inch in diameter. Larger ones will likely go to seed early, and smaller ones will not make a good-sized bulb.
  • They can be planted on a wide bed about four inches apart, with just the tip showing above the ground. If you prefer transplants, they too can be set out about three or four inches apart; or if you plan on using some as scallions, you may want to place them every two inches and removing every other one to eat as green onions, therefore leaving room for the remaining bulbs to reach full size.
  • Slips have usually been pulled at least three weeks before you take them home and may appear dry. This is all right; and if you like, you can freshen them up by letting them stay in a shallow pan of water with a handful of compost added for a couple of hours or overnight.
  • You should give your onions a side dressing of nitrogen after they have been growing for about three weeks and continue to side dress them every two weeks until the neck of the bulb begins to soften.
  • Always keep the soil pulled away from the plant when working around them, and never cover them too deeply.
  • They should be ready to harvest by the last of May or the first of June.
  • The green tops will become soft and topple over. That is the time to pull them and leave them to dry for two or three days.
  • The roots should then be snipped and the tops cut, leaving them a couple inches long. Store them in a cool, dry place where they are not touching each other and are receiving good air circulation. Some people place them in discarded panty hose, tying a knot between each onion and hanging the entire batch in a dry place.
  • Onions do not have many insect problems, but thrips (a very small yellow or black insect) may be found on the inner leaves.
  • Use insecticidal soap or other labeled insecticides for control (follow label directions, especially for last application prior to harvest).
  • Onion harvest should occur in May and June or when the onions have matured to the desired size. Pull the onions, leave laying in the row for 1-3 days for drying, clip the tops and roots and store in a cool dry place until needed.

http://easttexasgardening.tamu.edu/tips/veggie/janonion.html

The Mittleider Gardening Method – What is it?

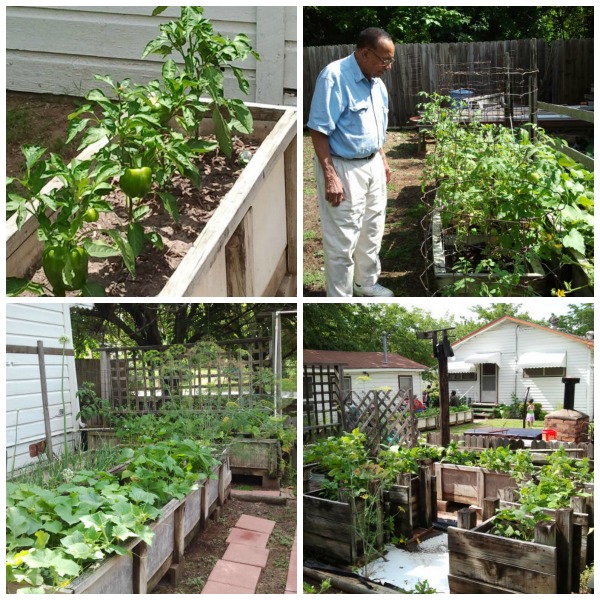
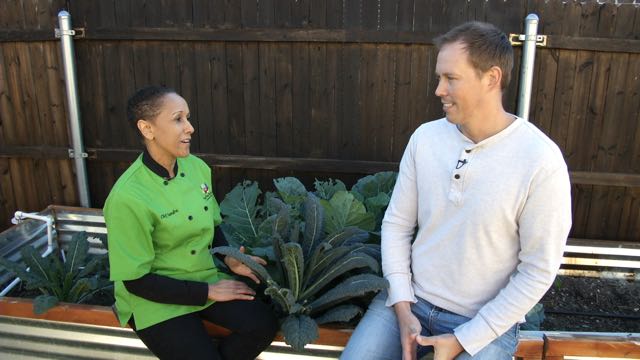
What in the world is “The Mittleider Gardening Method”? Do you know? Well, I have to admit that until this past year, I was not familiar with the Mittleider Gardening method either. It was my friend Cory Russell and his family who introduced me to this method of gardening. And once I saw Cory’s garden photos and heard him share the same passion that I have for gardening and eating fresh from his garden, I knew I wanted Cory to be a part of my first Backyard Gardening Video Series. You’ll see some amazing footage of Cory’s garden and I promise this will not be last of Cory’s garden you’ll see. This was Cory’s fall garden and we were able to grab this incredible footage just before the first Fall frost here in Dallas in November, 2014. I can’t wait to see Cory’s Spring garden. He tells me he has already started some seedlings inside. More to come!

mittleider4

Cory takes us on a tour of his amazing garden and shares exactly what is needed in order to grow this same kind of garden at your own home. And the good news is that it’s all above ground. It’s the same kind of container gardening that my dad has been doing for years and I too have adopted container gardening in my vegetable garden. My dad uses a lot of the same techniques that Cory shares but Dad’s fertilizer preference has always been a 10-20-10 mix for his garden along with some organic compost from his own compost pile.


It’s not too early to get ready for Spring Gardening. If you want to learn more about the Mittleider Gardening Method, here are a few links to explain more about it.

What is the Mittleider Gardening Method?

http://www.thesurvivalistblog.net/the-mittleider-gardening-method-explained/
http://healthyhomesteading.com/2011/05/the-mittleider-method-of-garden/

Cory’s Picks:

Pine Tree Seeds – http://www.superseeds.com/
Super Seeds and Rare Seeds – http://www.rareseeds.com/; www.superseeds.com
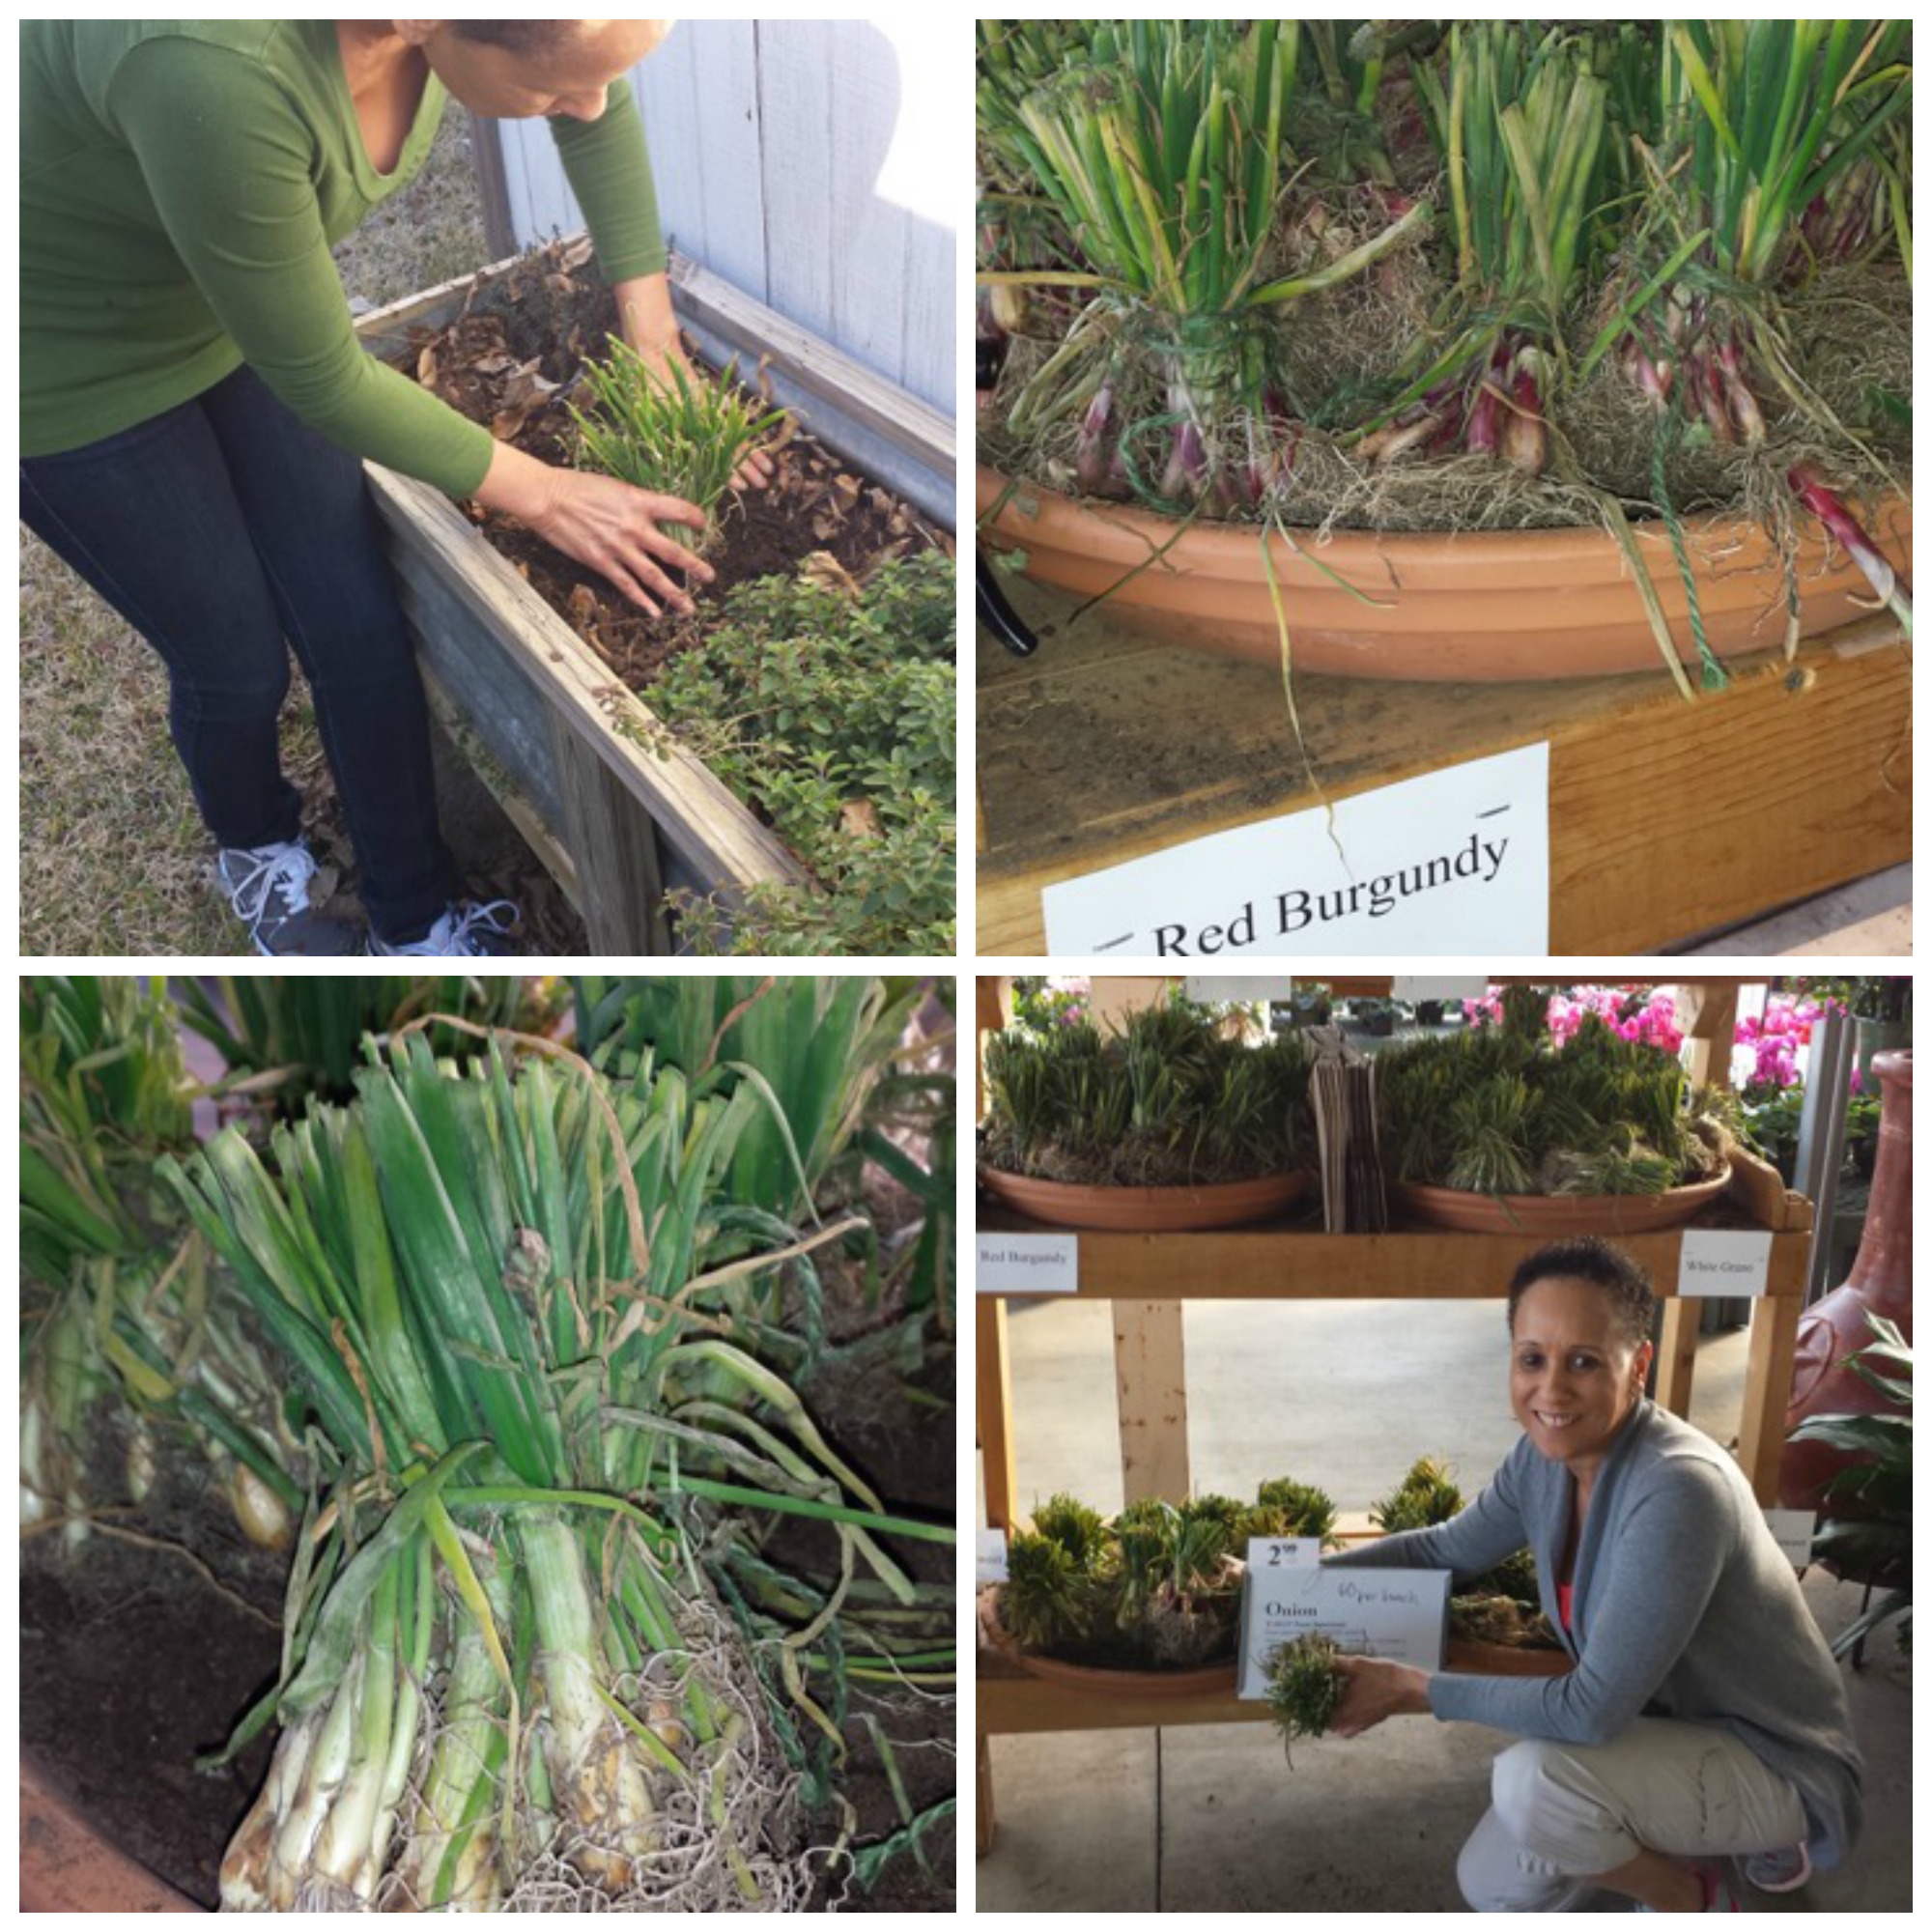
Favorite Varieties: Fish Pepper (heirloom), Bronze fennel, Egyptian walking onions, Belgium giant Tomato and Kellogs Breakfast Tomato
Paste tomato varieties – (opalka) ( polish lingusia) ( speckled roman)
New herbs – Blue Spice Basil, loveage, bulb fennel
New vegetables – greek red squash, ailsa craig onion, long from tropea onion, calypso cuke

Chef Sandra’s Garden Search

Fresh From the Gardens is looking for other noteworthy and interesting backyard gardens to visit this year. If you know someone who has some sort of vegetable garden that you think Chef Sandra should visit, contact us and let us know. Maybe your garden will also be featured as part of Chef Sandra’s Backyard Garden Video Series.