MAPLE AND ORANGE GLAZED HASSELBACK BUTTERNUT SQUASH

Maple and Orange Hasselback Butternut Squash
INGREDIENTS

  • 1 medium to large butternut squash
  • ¼ cup maple syrup
  • 2 tablespoons fresh squeezed orange juice
  • 1 tbsp extra virgin olive oil
  • 2 tbsp Dijon or  whole grain mustard
  • 1 tbsp finely chopped fresh thyme
  • 1 tbsp finely chopped marjoram
  • Sprinkle of salt and pepper


INSTRUCTIONS

  • Preheat your oven to 425°F

  • Adjust the oven rack to the top third position.
  • Cut the butternut squash in half lengthwise and scoop out the seeds and pulp and discard.

  • Remove the tough outer skin as well as the thin whitish layer beneath it.  Try using a vegetable peeler to complete this task. Once done, the orange flesh should be completely exposed.

  • On the roasting pan, place both squash halves cut side down.

  • Place in oven and bake for 20 minutes.

  • While the squash is in the oven, combine the maple syrup, orange juice, olive oil, Dijon mustard, chopped herbs, salt and pepper in a small bowl and mix well with a small whisk until completely combined.
  • Remove from the oven and let the squash cool until you can safely handle it with your bare hands.  This roughly takes about 5-10 minutes.

  • Move one squash half to a cutting board and place the handle of a wooden spoon (or other wooden utensil) on either side of the squash. The wooden tools will serve as guards to prevent the blade from going all the way as you slice through the squash.

  • Grab a sharp knife and carefully cut very thin slits in the squash, starting at the narrow end. DO NOT cut all the way through the squash. Return the sliced squash to the baking sheet and repeat with the second half.

  • Coat the squash halves with about 1/3 of the syrup mixture by brushing the mixture over the squash halves, paying special attention to getting the mixture down in between the slits.

  • Add 1/4 cup of water to the bottom of the pan and return to oven for 15 minutes.

  • While in the oven, constantly check on the squash to ensure that the syrup at the bottom of the pan doesn’t burn.  Remember, if needed, you can always add a small amounts of water, a few tablespoons at a time. Make sure not to add too much water.

  • After 15 minutes, remove the squash from the oven and brush with more of the syrup mixture.  Also, brush with some of the liquid at the bottom of the pan (pan juice) to boost this dish’s flavor and color.

  • Add another 1/4 cup water to bottom of the pan and return to the oven for another 15 minutes.

  • Remove the squash from the oven and brush with some of the pan juices.

  • If you would like to add the chopped pecans, now is the time.  Add them to the remaining syrup glaze and stir to combine. Spoon the pecan syrup glaze mixture over the top of the squash, dividing it equally between both halves.

  • Add another 1/4 cup water to bottom of the roasting pan and return it to the oven for the last 5 minutes, or until the squash is golden and tender.

  • Remove from oven; spoon some of the pan juices over the squash, sprinkle with a little bit of fresh herbs and a pinch of salt.

  • Move your masterpiece carefully over to a serving plate and ENJOY.

NOTES: 

This dish is sure to wow your family and friends so don’t be surprised when they are taking pictures and coming back for seconds !  This recipe was greatly inspired by The Healthy Foodie’s Honey Glazed Hasselback Butternut Squash.

Maple and Orange Hasselback Butternut Squash

Tomato Quinoa Salad with Radishes

Tomato Quinoa Salad with Radishes

Best with ingredients fresh from the garden!

Ingredients

  • 2 ½ cups water
  • 2 tablespoons sliced almonds (toasted)
  • 1 ¼ cups organic quinoa
  • 1/4 cup fresh chopped mint
  • 1/3 cup raisins (optional)
  • 2 tablespoons fresh chopped parsley
  • 1 pinch of salt
  • 1 tablespoon fresh chopped basil
  • 1 medium red onion (diced)
  • 1 tablespoon ground cumin
  • 1/2 cucumber – seeded and diced
  • 2 tablespoons sesame oil
  • 1 cup cherry tomatoes (sliced)
  • 1/4 cup fresh lime juice

Instructions

  1. Bring water to boil in a small saucepan.

  2.  Pour in quinoa, raisins, and a pinch of salt. 

  3. Cover, and let simmer for 12 to 15 minutes, then remove from heat, and allow to cool to room temperature.

  4. Toss together the tomatoes, onion, radish, cucumber, and almonds in a large bowl. 

  5. Stir in the cooled quinoa, then season with mint, parsley, cumin, lime juice, sesame oil, and salt.

  6.  Chill 1 to 2 hours before serving.

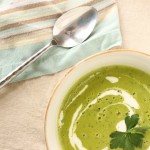
Spring Pea Soup

Spring Pea Soup

Spring officially begins in just days and if you’re anything like me, you’re ready to trade the rich, heavy foods of winter for lighter, fresher fare. We’re in that in-between time of less available produce at the end of winter but before the lush abundance of high summer salad days. Enter lovely lighter soups made of verdant sweet peas, tender greens and fresh herbs; the holy trinity of early spring. Here’s my take on a classic with suggestions to make it your own. Frozen peas are fine to use but good stock is a must.

  • 4 cups vegetable or chicken stock
  • 4 tbsp. butter
  • 1/2 cup yellow onion (roughly chopped)
  • 1 small carrot (peeled and roughly chopped)
  • 4 garlic cloves (peeled)
  • 1 bay leaf
  • 1/2 cup dry white wine
  • Juice of 1/2 a lemon
  • 3 sprigs fresh mint
  • 1/2 bunch fresh parsley (stems removed)
  • 4 cups fresh green peas or 2-10oz bags frozen green
  • peas
  • Salt and pepper to taste
  1. In a medium-sized stock pot, melt the butter over medium high heat. 

  2. When butter foams, add onion and carrot, cooking until onion is translucent.

  3. Add the garlic and bay leaf and cook a minute or two longer, stirring occasionally.

  4. Add white wine, and continue cooking until most of the wine has cooked away.

  5. Add your vegetable or chicken stock and lemon juice and bring to a low simmer. You may need to adjust the heat.

  6. As soon as it reaches a simmer, add your green peas.

  7. Bring back to a low simmer and let cook until peas are bright green, about 7 minutes.

  8. Remove from heat and let cool slightly, about 10 minutes. Be careful not to overcook once you add your peas, or you’ll end up with murky pond water soup instead of vibrant green soup!

  9. Carefully ladle or pour the soup into a blender along with the mint and parsley and puree until smooth. I like a really smooth pea soup but you may prefer it a little chunkier.

  10. Add salt and pepper to taste. If soup has cooled, you can rewarm it over low heat for a minute or two.

  11. **Here are some suggestions for garnishing your soup that will take it from simple to stellar.

    -Crumbled bacon

    -Sour cream or creme fraiche

    -Shredded parmesan

    -Julienned fresh mint leaves

    -Toasted chopped pistachios or almonds

    -Drizzle of good extra virgin olive oil

    -Lemon zest

Spinach, Mushroom & Ricotta Stuffed Shells

Spinach, Mushroom & Ricotta Stuffed Shells

Ingredients

  •  16 jumbo pasta shells (Cook a couple of extra shells to allow for a few breaking while the pasta cooks.)
  •  1-1/2 tbsp olive oil
  •  2 tsp fresh garlic (minced)
  •  4 cups (packed fresh spinach leaves, roughly-chopped)
  •  12 oz skim-milk ricotta cheese
  •  1 cup shredded skim-milk mozzarella cheese
  •  1/2 cup grated Parmesan cheese (plus more for serving)
  •  1 large egg
  •  1 tbsp fresh basil (finely chopped)
  •  1 tsp kosher salt
  •  1/2 tsp freshly-ground black pepper
  •  1-1/4 cups marinara sauce

Instructions

  1. Preheat the oven to 375 degrees. Cook the pasta al dente, according to package directions. Drain and set aside.
  2. Meanwhile, heat the olive oil in a large skillet over medium-high heat. When the oil begins to shimmer, add the garlic and cook until it begins to brown, about a minute or two. Add the spinach and cook, stirring occasionally, until the leaves begin to wilt but are still bright green, about 3 to 4 minutes. The spinach should be reduced by half. Remove from the heat and let cool.
  3. In a mixing bowl, stir together the spinach, ricotta, mozzarella, Parmesan, egg, basil and salt and pepper until thoroughly combined. Pour 1/2 cup of the marinara sauce into the bottom of a shallow 8-inch by 8-inch baking dish. Stuff each pasta shell with a generous amount of the spinach and ricotta mixture, and place in the baking dish.
  4. Cover with the remaining sauce and bake covered with aluminum foil for 25 minutes. Remove the foil and continue baking until the top begins to brown and the sauce begins the bubble, another 10-15 minutes. Serve warm with a dusting of Parmesan.